Bring focus and visual interest to your page with the Hero web part. You can display up to five items in the Hero web part and use compelling images, text, and links to draw attention to each. The Hero web part is included by default on Communication sites, but you can also add the Hero web part to other pages.
Notes:
Some functionality is introduced gradually to organizations that have opted in to the First Release program. This means that you may not yet see this feature or it may look different than what is described in the help articles.
You must have Edit permissions to create pages. If you are an owner but you are unable to add a page, your administrator may have turned off the ability to do so.
The Hero web part on Communication sites: Topic and Showcase
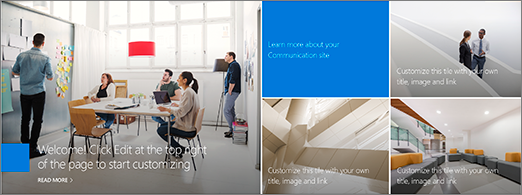
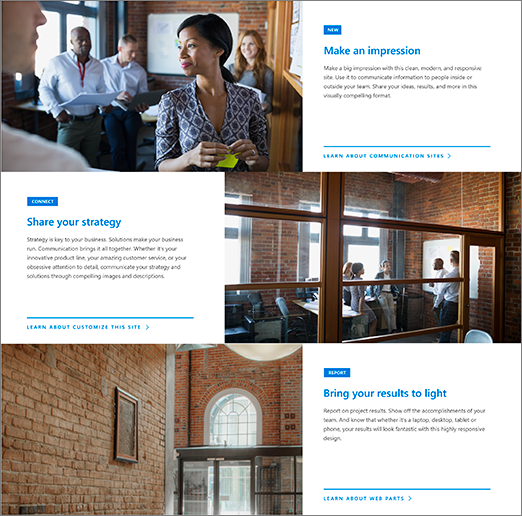
When you create a Communication site, the Hero web part is included on your page by default. It is pre-populated with default images, text and links that you change to showcase your own images, text, pages, or documents.
When you select Topic for the type of communication site you want, the default hero is a tiled layout with five tiles (which you can change from one to five):
When you select Showcase for the type of communication site you want, the default hero is a vertical layout with three layers (which you can change from one to five layers):
You can change the layout of the Hero web part from a grid to vertical layers using the Edit web part button  , and you can change the links, images, and text for each tile or layer using the Edit details button
  for each tile or layer.
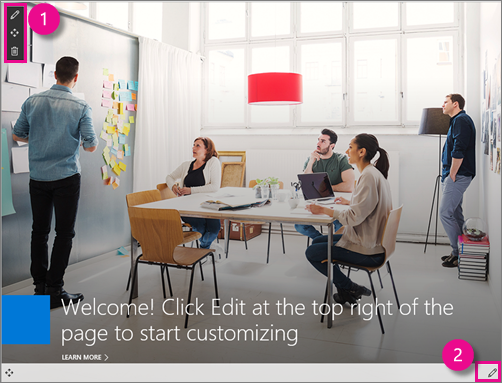
1. Edit web part button
2. Edit details button
Change the layout of the Hero web part
If you are not already in edit mode on your page, click Edit on the top right of the page.
Click the web part Edit web part button
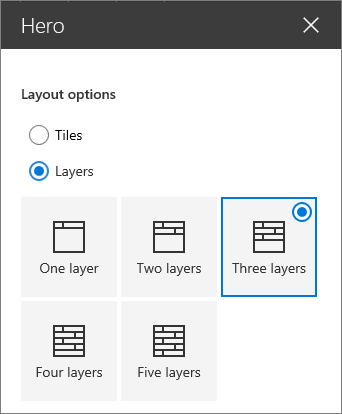
 on the left and select the type of layout you want - you can select up to 5 tiles (like that on a Topic site), or up to 5 layers (like that on a Showcase site).
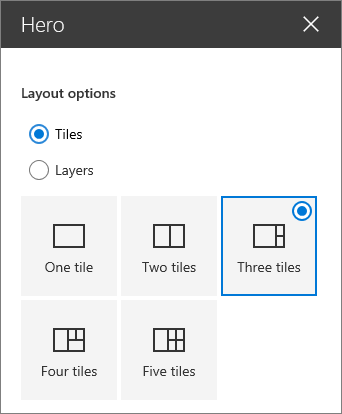
Change the image, text, and links for each tile or layer
If you are not already in edit mode on your page, click Edit on the top right of the page.
Click Edit details
 at the bottom right of the tile or layer you want to change.
In the toolbox, click Change, and then choose a location from which to get your link:
Recent: If you have recently opened images, pages, or documents you'll find them listed here.
Web search: You can find images from Bing that utilize the Creative Common license. You are responsible for reviewing licensing for an image before you insert it on your page.
OneDrive: You can get a link for a document or image you have stored on OneDrive.
Site: You can get a link for a document, image, or page from a Site you specify.
Upload: You can upload a document or image from a personal device.
From a link: Enter a link for your page, document, or image from OneDrive for Business or SharePoint Online.
Select your image, page, or document and click Open.
In the toolbox, under Image, select Custom image or Color only (Color only is available for the Tiles layout only).
The Auto-selected option automatically selects an image from the page or document that you are linking to, if one is available.
Enter Alternative text for the image.
Under Options:
You can show a Call to action link by switching the toggle to Yes. Then add your Call to action text (for example, "Learn more"). The Call to action link is available for each layer in a layered layout, but only for the largest tile in a tiled layout.
For a layered layout, you can also show a Topic heading for each layer by switching the toggle for Topic heading to Yes. Then add your Topic heading text.
Reorder tiles or layers
You can reorder tiles or layers by moving them where you want.
If you are not already in edit mode on your page, click Edit on the top right of the page.
Click and hold the Move item button, and then drag the tile or layer where you want.
Put the Hero web part in one column
The Hero web part is designed to take up the full width of the page. If you would rather the Hero web part did not take up the full width, you can add a column to the page, and put the Hero web part into that column.
If you're not in edit mode already, click Edit at the top right of the page.
Hover your mouse just above the Hero web part, and you'll see a line with a circled +, like this:

Click
 .
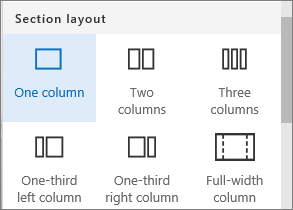
.Under Section layout, select one column.
On the left side of the web part, use the Move web part button to drag the Hero web part into the column you just added.

Add an empty Hero web part to a page
You can add a Hero web part to a page in a Team site or a Communication site. To do this:
If you are not already in edit mode on your page, click Edit on the top right of the page.
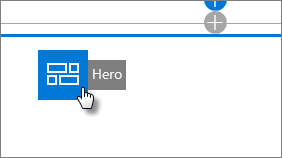
On your page, hover your mouse above or below an existing web part and you'll see a line with a circled +, like this:

Click +, and then choose the Hero web part.
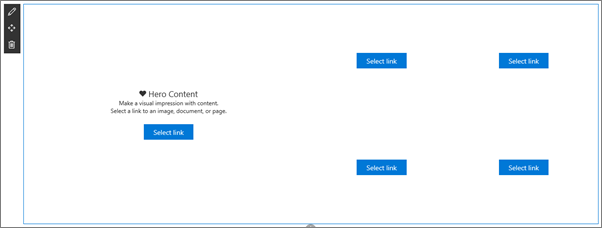
Click the web part Edit button
 and select the type of layout you want - a grid from 1 to 5 tiles may be used, or 1 to 5 vertical layers.
Click Select link for each tile you want to change.
For each tile, in the toolbox, click Select, and then choose a location from which to get your link:
Recent: If you have recently opened images, pages, or documents you'll find them listed here.
Web search: You can find images from Bing that utilize the Creative Common license. You are responsible for reviewing licensing for an image before you insert it on your page.
OneDrive: You can get a link for a document or image you have stored on OneDrive.
Site: You can get a link for a document, image, or page from a Site you specify.
Upload: You can upload a document or image from a personal device.
From a link: Enter a link for your page, document, or image from OneDrive for Business or SharePoint Online.
Select your image, page, or document and click Open.
In the toolbox, under Image, select Custom image or Color only. (The Auto-selected option automatically selects an image from the page or document that you are linking to, if one is available.)
Enter Alternative text for the image.
Under Options:
You can show a Call to action link by switching the toggle to Yes. Then add your Call to action text (for example, "Learn more"). The Call to action link is available for each layer in a layered layout, but only for the largest tile in a tiled layout.
For a layered layout, you can also show a Topic heading for each layer by switching the toggle for Topic heading to Yes. Then add your Topic heading text.


